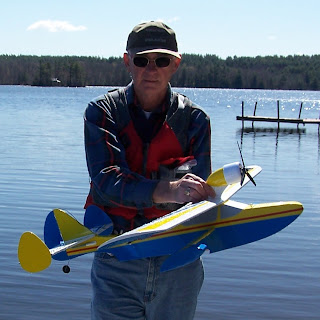
Added a few decals and installed Powerpole shorting plug to act as a switch. Ready to go. See notes below photos .........


Build Notes.....
K & A Models Unlimited Grumman Mallard Kit
Started week of Oct 8
Oct 11 - Cut slots for motor mounts with bandsaw
Glued on leading edges strips 30 min E
Glued up motor mounts - reinforced by a piece of 1/8 strips in cornors - Med CA
Oct 12 - Started forming leading edges
Oct 15 - Formed leading edges - cut slots in leading edges and enlarged slots to receive the motor mounts. Test fitted mounts. 15 min E
Glued on wing tip blocks
Oct 18 - started forming the wing tip blocks.
Cut out ailerons and added cap to aileron slots on wings.
Oct 19 - Beveled aileron angles and glued cap strips.
Oct 24 - Sanded aileron and wing trailing edges down to aprox 1/16. Cut holes for aileron servos and motor leads.
Oct 26 - More sanding on trailing edges.
Oct 27 - Glued wing halves together with 30 min E - Added 2 inch fiberglass strip to bottom
Oct 28 - Wing and ailerons - total weight now 5.8 ozs
Added fiberglass 3" strip to top center section
Oct 29 - Feathered fiberglass strips. Glassed wing bottom with 0.75 oz cloth and Minwax Polycrylic. Wing now weighs 6.0 ozs
Oct 31 - Glassed top of wing
Nov 1 - 3 Sanded and applied more Polycrylic to smooth surface.
Nov 3 - fit wing to fuselage.Applied more Polycrylic to smooth surface. Wing/Ailerons weight now 7.4 ozs
Nov 4 - glued wing holddowns in place with 15m E and microballons. First coat of polycrylic on ailerons.
Nov 8 - Added caps to end of ailerons and aileron cutouts in wing.
Nov 10 - Sanded wing tips to match ailerons - glued 1/64 ply reinforcements to top front & rear of wing.
Nov 15 - Used drill press to get wing holddown screw holes centered properly. Added blind nuts to fuse to receive 10/32 nylon screws.
Nov 16 - Added a beveled piece of balsa for front holddown screw. Wing bolts down on saddle OK. Added 1/64 ply floor and servo rails to aileron servo cutouts.
Nov 17 - inserted aileron extension in each side. Sanded slots and inserted both motor mounts.
Nov 19 - Soldered up two CC Thunderbird 18 EScs in parallel. Common Battery. No need to disconnect either BEC according to CC Support. Updated both to latest FW and applied Corrosion-X.
Nov 21 - Configured DX7 for differential throttle control.
Nov 22 - Mounted motors in test bracket and connected receiver, ESCs, and battery and tested differential throttle - Works fine!! 250+ watts. 27 amps - half discharged battery spinning MA 6x4-3 blade props!
I was able to set up the three mixes last night in about 15 mins thanks to the servo position display on the DX7.
When I activate the mixes with a switch, the left motor will speed up for a right turn and right for a left turn. How much speedup depends on how much I move the rudder left or right. This morning, I connected all the motors, receiver and battery and tested with a tach. Works GREAT! Up to about 1800 rpm speedup with present settings. I may have to adjust the mixes after I find out how much differential is really needed.
Also looks like normal max throttle prop speed is the same on both. Shouldn't cause any trim issues. Don't know what would happen at speed if differential steering was turned on!
Dipped AR7000 receiver in Corrosion-X.
Nov 23 - Noticed the right side motor doesn't start as easy as the left. Swapped ESCs and problem moved with ESC. Replaced that ESCwith another and OK now.
Dec 10 - LT-25 is down - now back on Mallard. Glued motor mounts into wing with 30 min Epoxy.
Dec 13 - Added wing ABS fairings with 15 min epoxy. Also made an block around the screw holes so water cannot get under fairings. (see photo)
Dec 15 - Used white micro-fill to smooth out edges of fairings. Added supports for servo covers to aileron servo openings.
Dec 16 - Started on motor nacelles - installed ESC extension wiring and tested. One issue noted with differential throttle is if signal lost is the throttle channel stops the motor (failsafe) but the mixed channel - Aux2 keeps at its last position.
Glued on top part of motor nacelles. Screws mount the bottom section.
Dec 17 - Finished the right side nacelle. Tested both servos after CorrosionX bath. OK.
Dec 20 - Nacelles all down. Motor cowl mounts with two screws. Installed servos.
Dec 21 - Glued the float supports to the wing. Had to make up one as there were parts for only one. Started on the floats. Cut out and glued together. Hate this part.
Dec 22 - Glued the float support to floats w/5 min E. Painted front of motor mount black and used Polycrylic to waterproof the remaining parts of motor mounts.
Dec 23 - Sealed float supports with sanding sealer. Used one screw in each to secure to support. Made the aileron servo covers. Sealed some of the area in the motor nacelles to help keep out water. Wing with ailerons weighs 16.8 ozs before painting and adding the aileron controls.
Horiz spar and elevators hinges added and bent up elevator torgue rod. CAed the holes for the pin hinges and checked fit.
Dec 24 - Soldered elevator control horn to torque rod. Cut out slots in vert fine for horiz stab. Test fit same with torque rod and elevators.
Rough formed a piece of hard balsa to fill vert stab end. Also formed a piece of hard balsa as a support for the horiz stab.
Dec 25 - glued in the support for the horiz stab and the horiz stab itself. Used CA, CA Med, and 5 min epoxy. Made up a pushrod for the elevator with 1/16 MW and a carbon fiber tube. Made up servo tray from 1/8 lite ply and glued in place. Added the HS-81 servos for rudder and elevator.
Dec 26 - Connected elevator pushrod and tested servo. OK.
Dec 27 - started forming the rudder. Glued on the rudder cap with CA.
Dec 28 - Worked on forming the rudder and cap.
Dec 29 - Forming rudder and cap. Cut slot and added the rudder nyrod guide in fuselage side. Secured nyrod to a carbon fiber rod to prevent flexing. Secured carbon fiber rod at both ends. Glued in tail filler with 5 min E. Beveled the rudder and slotted for CA hinges.
Dec 30 - Balsa filling to smooth areas on tail group. First coat of Polycrylic.
Dec 31 - Second coat of Polycrylic on tail group.
Jan 9 - finished painting hull and wing.
Jan 13 - Painting finished.
Jan 14 - started spraying Polycrylic. 3 coats done.
Jan 15 - Installed tip floats - added trim - added deicer boots - hinged rudder and elevator & ailerons - connected all servos
Jan 16 - Tail heavy with one battery (no battery box). 43.6 ozs Set up aileron throws.
INstalled a long piece of 1/8 ply to hold two batteries as far forward as possible. Foam in front of ply centers it in nose and one screw holds rear to servo mounting surface. AUW 50.2 ozs CG OK.
Steering worked OK in deep snow. One short flight and knocked off one tip float on landing. Plenty of power.Flew OK but very windy.
Jan 17 - Redid aileron arm mounts by adding a piece of balsa epoxied in and screwed control arm to that.
Jan 19 - removed aileron tape hinges and installed Dubro flat hinges - 3 small per aileron. Used 6 min epoxy.
Reduced differential steering to 15%. Static test with eLogger shows 379 watts. Motocalc only shows 281 watts.
Jan 20 - added a Maxx products Powerpole power connector for battery system. Screwed and epoxied in place.
Jan 26 - added numbers and FLA decals made on inkjet from Avery Clear Sheet Label stock. Used Clear Acrylic Sealer to waterproof them.
Added a CC BEC running at 5.5 volts
Mar 10 - Replaced AR7000 with AR9000 - cuts off second throttle when failsafe.
Ailerons 1/8 throw - Elevator 3/16 throw - Rudder max throw


 Build Notes.....
K & A Models Unlimited Grumman Mallard Kit
Started week of Oct 8
Oct 11 - Cut slots for motor mounts with bandsaw
Glued on leading edges strips 30 min E
Glued up motor mounts - reinforced by a piece of 1/8 strips in cornors - Med CA
Oct 12 - Started forming leading edges
Oct 15 - Formed leading edges - cut slots in leading edges and enlarged slots to receive the motor mounts. Test fitted mounts. 15 min E
Glued on wing tip blocks
Oct 18 - started forming the wing tip blocks.
Cut out ailerons and added cap to aileron slots on wings.
Oct 19 - Beveled aileron angles and glued cap strips.
Oct 24 - Sanded aileron and wing trailing edges down to aprox 1/16. Cut holes for aileron servos and motor leads.
Oct 26 - More sanding on trailing edges.
Oct 27 - Glued wing halves together with 30 min E - Added 2 inch fiberglass strip to bottom
Oct 28 - Wing and ailerons - total weight now 5.8 ozs
Added fiberglass 3" strip to top center section
Oct 29 - Feathered fiberglass strips. Glassed wing bottom with 0.75 oz cloth and Minwax Polycrylic. Wing now weighs 6.0 ozs
Oct 31 - Glassed top of wing
Nov 1 - 3 Sanded and applied more Polycrylic to smooth surface.
Nov 3 - fit wing to fuselage.Applied more Polycrylic to smooth surface. Wing/Ailerons weight now 7.4 ozs
Nov 4 - glued wing holddowns in place with 15m E and microballons. First coat of polycrylic on ailerons.
Nov 8 - Added caps to end of ailerons and aileron cutouts in wing.
Nov 10 - Sanded wing tips to match ailerons - glued 1/64 ply reinforcements to top front & rear of wing.
Nov 15 - Used drill press to get wing holddown screw holes centered properly. Added blind nuts to fuse to receive 10/32 nylon screws.
Nov 16 - Added a beveled piece of balsa for front holddown screw. Wing bolts down on saddle OK. Added 1/64 ply floor and servo rails to aileron servo cutouts.
Nov 17 - inserted aileron extension in each side. Sanded slots and inserted both motor mounts.
Nov 19 - Soldered up two CC Thunderbird 18 EScs in parallel. Common Battery. No need to disconnect either BEC according to CC Support. Updated both to latest FW and applied Corrosion-X.
Nov 21 - Configured DX7 for differential throttle control.
Nov 22 - Mounted motors in test bracket and connected receiver, ESCs, and battery and tested differential throttle - Works fine!! 250+ watts. 27 amps - half discharged battery spinning MA 6x4-3 blade props!
I was able to set up the three mixes last night in about 15 mins thanks to the servo position display on the DX7.
When I activate the mixes with a switch, the left motor will speed up for a right turn and right for a left turn. How much speedup depends on how much I move the rudder left or right. This morning, I connected all the motors, receiver and battery and tested with a tach. Works GREAT! Up to about 1800 rpm speedup with present settings. I may have to adjust the mixes after I find out how much differential is really needed.
Also looks like normal max throttle prop speed is the same on both. Shouldn't cause any trim issues. Don't know what would happen at speed if differential steering was turned on!
Dipped AR7000 receiver in Corrosion-X.
Nov 23 - Noticed the right side motor doesn't start as easy as the left. Swapped ESCs and problem moved with ESC. Replaced that ESCwith another and OK now.
Dec 10 - LT-25 is down - now back on Mallard. Glued motor mounts into wing with 30 min Epoxy.
Dec 13 - Added wing ABS fairings with 15 min epoxy. Also made an block around the screw holes so water cannot get under fairings. (see photo)
Dec 15 - Used white micro-fill to smooth out edges of fairings. Added supports for servo covers to aileron servo openings.
Dec 16 - Started on motor nacelles - installed ESC extension wiring and tested. One issue noted with differential throttle is if signal lost is the throttle channel stops the motor (failsafe) but the mixed channel - Aux2 keeps at its last position.
Glued on top part of motor nacelles. Screws mount the bottom section.
Dec 17 - Finished the right side nacelle. Tested both servos after CorrosionX bath. OK.
Dec 20 - Nacelles all down. Motor cowl mounts with two screws. Installed servos.
Dec 21 - Glued the float supports to the wing. Had to make up one as there were parts for only one. Started on the floats. Cut out and glued together. Hate this part.
Dec 22 - Glued the float support to floats w/5 min E. Painted front of motor mount black and used Polycrylic to waterproof the remaining parts of motor mounts.
Dec 23 - Sealed float supports with sanding sealer. Used one screw in each to secure to support. Made the aileron servo covers. Sealed some of the area in the motor nacelles to help keep out water. Wing with ailerons weighs 16.8 ozs before painting and adding the aileron controls.
Horiz spar and elevators hinges added and bent up elevator torgue rod. CAed the holes for the pin hinges and checked fit.
Dec 24 - Soldered elevator control horn to torque rod. Cut out slots in vert fine for horiz stab. Test fit same with torque rod and elevators.
Rough formed a piece of hard balsa to fill vert stab end. Also formed a piece of hard balsa as a support for the horiz stab.
Dec 25 - glued in the support for the horiz stab and the horiz stab itself. Used CA, CA Med, and 5 min epoxy. Made up a pushrod for the elevator with 1/16 MW and a carbon fiber tube. Made up servo tray from 1/8 lite ply and glued in place. Added the HS-81 servos for rudder and elevator.
Dec 26 - Connected elevator pushrod and tested servo. OK.
Dec 27 - started forming the rudder. Glued on the rudder cap with CA.
Dec 28 - Worked on forming the rudder and cap.
Dec 29 - Forming rudder and cap. Cut slot and added the rudder nyrod guide in fuselage side. Secured nyrod to a carbon fiber rod to prevent flexing. Secured carbon fiber rod at both ends. Glued in tail filler with 5 min E. Beveled the rudder and slotted for CA hinges.
Dec 30 - Balsa filling to smooth areas on tail group. First coat of Polycrylic.
Dec 31 - Second coat of Polycrylic on tail group.
Jan 9 - finished painting hull and wing.
Jan 13 - Painting finished.
Jan 14 - started spraying Polycrylic. 3 coats done.
Jan 15 - Installed tip floats - added trim - added deicer boots - hinged rudder and elevator & ailerons - connected all servos
Jan 16 - Tail heavy with one battery (no battery box). 43.6 ozs Set up aileron throws.
INstalled a long piece of 1/8 ply to hold two batteries as far forward as possible. Foam in front of ply centers it in nose and one screw holds rear to servo mounting surface. AUW 50.2 ozs CG OK.
Steering worked OK in deep snow. One short flight and knocked off one tip float on landing. Plenty of power.Flew OK but very windy.
Jan 17 - Redid aileron arm mounts by adding a piece of balsa epoxied in and screwed control arm to that.
Jan 19 - removed aileron tape hinges and installed Dubro flat hinges - 3 small per aileron. Used 6 min epoxy.
Reduced differential steering to 15%. Static test with eLogger shows 379 watts. Motocalc only shows 281 watts.
Jan 20 - added a Maxx products Powerpole power connector for battery system. Screwed and epoxied in place.
Jan 26 - added numbers and FLA decals made on inkjet from Avery Clear Sheet Label stock. Used Clear Acrylic Sealer to waterproof them.
Added a CC BEC running at 5.5 volts
Mar 10 - Replaced AR7000 with AR9000 - cuts off second throttle when failsafe.
Ailerons 1/8 throw - Elevator 3/16 throw - Rudder max throw
Build Notes.....
K & A Models Unlimited Grumman Mallard Kit
Started week of Oct 8
Oct 11 - Cut slots for motor mounts with bandsaw
Glued on leading edges strips 30 min E
Glued up motor mounts - reinforced by a piece of 1/8 strips in cornors - Med CA
Oct 12 - Started forming leading edges
Oct 15 - Formed leading edges - cut slots in leading edges and enlarged slots to receive the motor mounts. Test fitted mounts. 15 min E
Glued on wing tip blocks
Oct 18 - started forming the wing tip blocks.
Cut out ailerons and added cap to aileron slots on wings.
Oct 19 - Beveled aileron angles and glued cap strips.
Oct 24 - Sanded aileron and wing trailing edges down to aprox 1/16. Cut holes for aileron servos and motor leads.
Oct 26 - More sanding on trailing edges.
Oct 27 - Glued wing halves together with 30 min E - Added 2 inch fiberglass strip to bottom
Oct 28 - Wing and ailerons - total weight now 5.8 ozs
Added fiberglass 3" strip to top center section
Oct 29 - Feathered fiberglass strips. Glassed wing bottom with 0.75 oz cloth and Minwax Polycrylic. Wing now weighs 6.0 ozs
Oct 31 - Glassed top of wing
Nov 1 - 3 Sanded and applied more Polycrylic to smooth surface.
Nov 3 - fit wing to fuselage.Applied more Polycrylic to smooth surface. Wing/Ailerons weight now 7.4 ozs
Nov 4 - glued wing holddowns in place with 15m E and microballons. First coat of polycrylic on ailerons.
Nov 8 - Added caps to end of ailerons and aileron cutouts in wing.
Nov 10 - Sanded wing tips to match ailerons - glued 1/64 ply reinforcements to top front & rear of wing.
Nov 15 - Used drill press to get wing holddown screw holes centered properly. Added blind nuts to fuse to receive 10/32 nylon screws.
Nov 16 - Added a beveled piece of balsa for front holddown screw. Wing bolts down on saddle OK. Added 1/64 ply floor and servo rails to aileron servo cutouts.
Nov 17 - inserted aileron extension in each side. Sanded slots and inserted both motor mounts.
Nov 19 - Soldered up two CC Thunderbird 18 EScs in parallel. Common Battery. No need to disconnect either BEC according to CC Support. Updated both to latest FW and applied Corrosion-X.
Nov 21 - Configured DX7 for differential throttle control.
Nov 22 - Mounted motors in test bracket and connected receiver, ESCs, and battery and tested differential throttle - Works fine!! 250+ watts. 27 amps - half discharged battery spinning MA 6x4-3 blade props!
I was able to set up the three mixes last night in about 15 mins thanks to the servo position display on the DX7.
When I activate the mixes with a switch, the left motor will speed up for a right turn and right for a left turn. How much speedup depends on how much I move the rudder left or right. This morning, I connected all the motors, receiver and battery and tested with a tach. Works GREAT! Up to about 1800 rpm speedup with present settings. I may have to adjust the mixes after I find out how much differential is really needed.
Also looks like normal max throttle prop speed is the same on both. Shouldn't cause any trim issues. Don't know what would happen at speed if differential steering was turned on!
Dipped AR7000 receiver in Corrosion-X.
Nov 23 - Noticed the right side motor doesn't start as easy as the left. Swapped ESCs and problem moved with ESC. Replaced that ESCwith another and OK now.
Dec 10 - LT-25 is down - now back on Mallard. Glued motor mounts into wing with 30 min Epoxy.
Dec 13 - Added wing ABS fairings with 15 min epoxy. Also made an block around the screw holes so water cannot get under fairings. (see photo)
Dec 15 - Used white micro-fill to smooth out edges of fairings. Added supports for servo covers to aileron servo openings.
Dec 16 - Started on motor nacelles - installed ESC extension wiring and tested. One issue noted with differential throttle is if signal lost is the throttle channel stops the motor (failsafe) but the mixed channel - Aux2 keeps at its last position.
Glued on top part of motor nacelles. Screws mount the bottom section.
Dec 17 - Finished the right side nacelle. Tested both servos after CorrosionX bath. OK.
Dec 20 - Nacelles all down. Motor cowl mounts with two screws. Installed servos.
Dec 21 - Glued the float supports to the wing. Had to make up one as there were parts for only one. Started on the floats. Cut out and glued together. Hate this part.
Dec 22 - Glued the float support to floats w/5 min E. Painted front of motor mount black and used Polycrylic to waterproof the remaining parts of motor mounts.
Dec 23 - Sealed float supports with sanding sealer. Used one screw in each to secure to support. Made the aileron servo covers. Sealed some of the area in the motor nacelles to help keep out water. Wing with ailerons weighs 16.8 ozs before painting and adding the aileron controls.
Horiz spar and elevators hinges added and bent up elevator torgue rod. CAed the holes for the pin hinges and checked fit.
Dec 24 - Soldered elevator control horn to torque rod. Cut out slots in vert fine for horiz stab. Test fit same with torque rod and elevators.
Rough formed a piece of hard balsa to fill vert stab end. Also formed a piece of hard balsa as a support for the horiz stab.
Dec 25 - glued in the support for the horiz stab and the horiz stab itself. Used CA, CA Med, and 5 min epoxy. Made up a pushrod for the elevator with 1/16 MW and a carbon fiber tube. Made up servo tray from 1/8 lite ply and glued in place. Added the HS-81 servos for rudder and elevator.
Dec 26 - Connected elevator pushrod and tested servo. OK.
Dec 27 - started forming the rudder. Glued on the rudder cap with CA.
Dec 28 - Worked on forming the rudder and cap.
Dec 29 - Forming rudder and cap. Cut slot and added the rudder nyrod guide in fuselage side. Secured nyrod to a carbon fiber rod to prevent flexing. Secured carbon fiber rod at both ends. Glued in tail filler with 5 min E. Beveled the rudder and slotted for CA hinges.
Dec 30 - Balsa filling to smooth areas on tail group. First coat of Polycrylic.
Dec 31 - Second coat of Polycrylic on tail group.
Jan 9 - finished painting hull and wing.
Jan 13 - Painting finished.
Jan 14 - started spraying Polycrylic. 3 coats done.
Jan 15 - Installed tip floats - added trim - added deicer boots - hinged rudder and elevator & ailerons - connected all servos
Jan 16 - Tail heavy with one battery (no battery box). 43.6 ozs Set up aileron throws.
INstalled a long piece of 1/8 ply to hold two batteries as far forward as possible. Foam in front of ply centers it in nose and one screw holds rear to servo mounting surface. AUW 50.2 ozs CG OK.
Steering worked OK in deep snow. One short flight and knocked off one tip float on landing. Plenty of power.Flew OK but very windy.
Jan 17 - Redid aileron arm mounts by adding a piece of balsa epoxied in and screwed control arm to that.
Jan 19 - removed aileron tape hinges and installed Dubro flat hinges - 3 small per aileron. Used 6 min epoxy.
Reduced differential steering to 15%. Static test with eLogger shows 379 watts. Motocalc only shows 281 watts.
Jan 20 - added a Maxx products Powerpole power connector for battery system. Screwed and epoxied in place.
Jan 26 - added numbers and FLA decals made on inkjet from Avery Clear Sheet Label stock. Used Clear Acrylic Sealer to waterproof them.
Added a CC BEC running at 5.5 volts
Mar 10 - Replaced AR7000 with AR9000 - cuts off second throttle when failsafe.
Ailerons 1/8 throw - Elevator 3/16 throw - Rudder max throw


